

This is my first Easter with a little girl of my own to sew for. Last year I sewed dresses for Emily's girls, and I'm afraid to say it, but I didn't make a thing for them this year. Sorry girls! And sorry to my boys too for that matter. Last year I made them adorable matching bow ties.
I am not sure that I'm going to find the time to make my own little girl a dress this year. But, I did make her at least one adorable thing to wear to church on Easter Sunday.

I'm a sucker for the traditional look for babies, and I love bonnets. I picked up a small embroidered and hand appliqued linen at the Goodwill a few months back with the idea of making an Easter bonnet for my baby girl. It sat in my pile until yesterday, when I finally decided to give it a try. I started off with this pattern, but had to change quite a few things to make it work. I was a little limited with the shape of my brim because I wanted to use the pretty bottom edges from the linen. And then I had my usual problem with commercial patterns never fitting the way they should. After the first time I sewed it up, the bonnet was roomy on my two year old, and it was supposed to be for an infant. Eventually I took it in enough times to make it fit. Honestly, it's not completely perfect, but I'm working really hard at not letting the perfect be the enemy of the good.
The linen was sort of small, so I had to cut it in half and sew the pieces together the other way to make the embroidered edge wide enough to form a brim. I used a french seam to keep it tidy, and hand tacked the seam down in the front. This means that the pretty hand appliqued pattern is only on one side, but I think it looks kind of sweet that way.
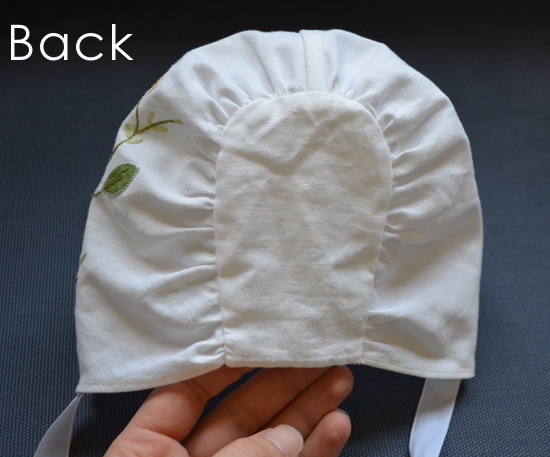
I had just enough fabric to cut two pieces for the back so that I could hide all the seams. I used the finished sides of the linen for the bottom edge, so that I didn't have to hem that later. To construct the bonnet, I gathered the brim piece to fit the back and sewed it to one of my two pieces. When I got the sizes worked out, I sewed the second piece on so that the brim was sandwiched in the middle. After that I flipped the bonnet right side out and hand stitched the opening (along the back bottom edge) shut.

The last thing to do was to add ribbon ties to each side.


4 comments:
Carlee, the bonnet is so adorable. It turned out great, and as always I am fascinated with your eye for thrift.
I just love the bonnet. You did an outstanding job.
It looks perfect! I'm dreaming of pulling something off for Sunday, but chances are pretty low right now. What a score on this fabric! It's so sweet!
This is the most beautiful bonnet I've ever seen!
Post a Comment